A photo gallery is a good thing to add to your website if you have images included in an article. Photo gallery displays photos nicely arranged in rows and columns so more photos can be displayed in less space. In this article, we will see how to create a photo gallery in WordPress website and how to edit existing gallery.
It is super easy to add images in a WordPress post. But without a gallery, the photos will appear one after another, which takes up a lot of space and not so good aesthetically. If you have multiple related images in a WordPress post, you can create a photo gallery instead.
WordPress comes with a built-in gallery feature for creating photo galleries at ease without the need to use any additional plugins for creating photo galleries.
How To Create a Photo Gallery In WordPress Website by using the default photo gallery feature in WordPress
Watch this short video on how to create photo gallery in WordPress website or jump the video and read on.
First, create a new post or edit an existing WordPress post.
Place the cursor where you want to insert the photo gallery.
Then, click on ADD MEDIA button.
If you already have the images uploaded in the WordPress Media, click on Create a New Gallery. Otherwise, upload the images and then click on Create a New Gallery.
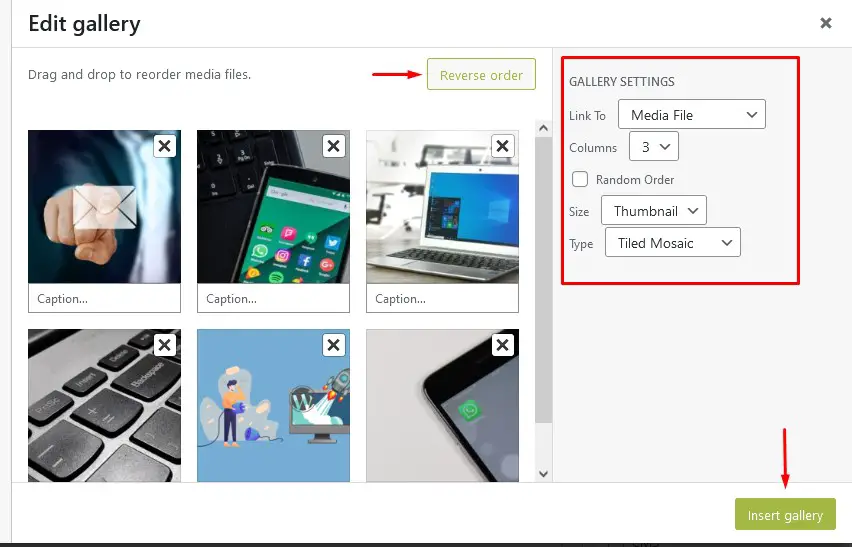
Click REORDER to reorder the images. You can also drag images to order the images.
Adjust the GALLERY SETTINGS as you desire.
- LINK TO
- Link To= None: User can only view the photos in the gallery as it is. The photos will not be clickable, that is, it will not show an enlarged photo.
- Link To= Media: The images will be clickable and the image will open when clicked.
- Link To= Attachment Page: It will open an attachment page specific for the gallery.
If you want users to be able to view enlarged photo, choose Link To = Media. If WordPress Lightbox plugin is enabled, you should choose Link To = Media to be able to view the enlarged photos in Lightbox.
- Columns: choose the appropriate columns to arrange the photos
- Size: Set the size display image
- Type: Select appropriate GALLERY TYPE
After adjusting the gallery settings, click INSERT GALLERY
The gallery will be inserted in the WordPress post.
Then, PUBLISH / UPDATE the WordPress post. Then view the post to see the gallery added.

How to edit the Photo Gallery added to the WordPress post
To edit the photo gallery added to the WordPress post,
- Go back to the WordPress post and edit it. Find the gallery to edit.
- Bring the mouse cursor to the photo gallery.
- Click on the EDIT icon
- Adjust the photo gallery settings.
If you need to add more photos to the gallery, you can add more.
After you are done editing the photo gallery, update the post. View the post again and see the changes.