If you purchased a new computer with windows operating system already installed, then the hard is ready to use already. But hard disk may have only one partition and you might want to create additional partitions in the hard disk. In this case, you can use windows disk management utility to create additional partitions in the hard disk easily. In this post, we will see how to create disk partitions in Windows using windows disk management utility.
How to create additional disk partition in hard disk using windows disk management utility
If your windows computer has only one hard disk partition, then you can use windows disk management utility to create additional partitions if you like. Creating additional disk partition is preferred because you can keep your data separate from the C drive where windows operating system is generally installed. In the event of a system crash and if windows operating system needs to be reinstalled, then windows OS can be installed without affecting your data in the other disk partitions.
Open Windows Disk Management Utility
- Right click on ‘This PC’ in File Explorer and click Manage. This will open Computer Management.
- Then choose Disk Management from the left-hand pane of the Computer Management screen.
Create new disk partition in windows disk management utility
First, shrink existing C partition by size desired. This will create an unallocated space.
Then, Create new simple volume from the unallocated space created from the shrink above.
For example:
The hard disk is of 512 GB. Now you want to split this 512 GB partition in to two partitions with 312 GB and 200 GB partitions.
- Right click on the 512 GB partition > click on SHRINK > the wizard opens.
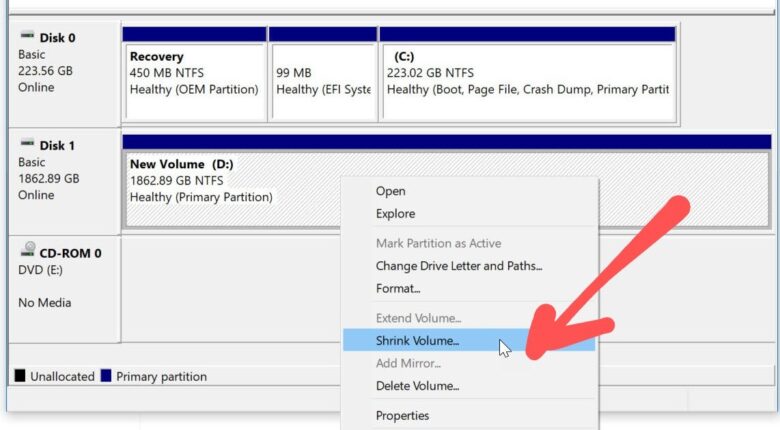
- Enter the size to shrink in MB. So we enter: 200 x 1024 = 204800 (MB). Follow the rest of the prompts by the wizard. After the process completes, a new partition is created which is ‘Unallocated (black)’ of size 200 GB.
- Next, right-click on the new unallocated partition > select New Simple Volume and follow the rest of the prompts.
- During the process, you will be asked to enter size (keep as it is), select file format (NTFS by default), volume name etc.
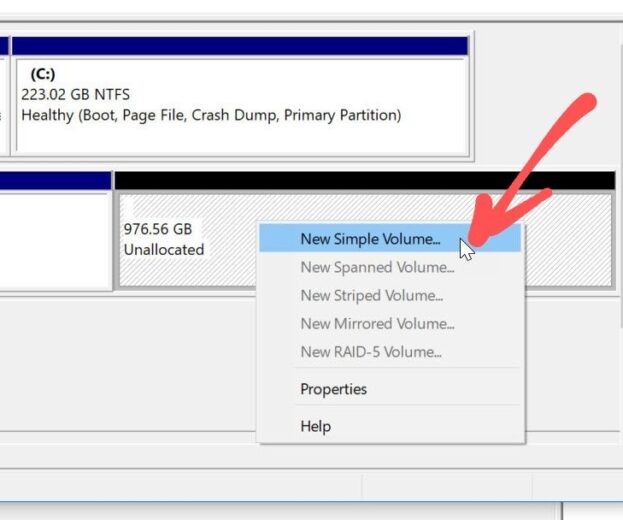
- After the process completes, you should be able to see a new partition of 200 GB whoch is now formatted and ready to use.
Open Windows Explorer and you should see these partitions separately.
If you want to create more partitions:
If you want to create more than one partition from a single disk partition, then you first do some simple math and create a ‘big partition’ first following the steps above. And then, split the new partition following the same steps above.
Suppose you want to split a 500 GB HDD into three total partitions of 200 GB,200 GB and 100 GB.
- First, shrink the C drive by 300 GB. Then, you have 200 GB (C drive) and one unallocated partition of 300 GB.
- Next, shrink the 300 GB by 100 GB.
- Now, you will have 200 GB, 200 GB and 100 GB partitions.
Don’t have Windows 11 OS?
You can buy it on Amazon on great discounts. Check out the link below.
Microsoft Windows 11 Pro 64-Bit | FPP | USB 3.0 | Single License

# how to create new disk partition in windows
# create disk partition in windows disk management utility