There are several ways to migrate a WordPress site from development server to a live server. The traditional way is to manually move the files to the live server via FTP or Host’s Control Panel’s File Manager and import the database. But that requires manual editing such as updating the URL etc. While it is not so difficult, there could be issues if there are some misses due to manual editing. In this post, we shall see How to Migrate WordPress Website using WordPress Duplicator Plugin from local server to live server. If you don’t know what plugins are, read this article to learn more.
WordPress Duplicator plugin is a very useful WordPress plugin to migrate WordPress website from one host to another. You can use the WordPress Duplicator plugin to move a WordPress website from local development computer to the live server (web hosting). You can also use the Duplicator plugin to move a WordPress website from one host to another host. Or from a staging server to a live one.
Video: How to Migrate WordPress Website using WordPress Duplicator Plugin from local server to live server
Watch this video which shows a demo How to Migrate WordPress Website using WordPress Duplicator Plugin from local server to live server. If you want to skip the video, read on below the video.
How to Migrate WordPress Website using WordPress Duplicator Plugin from local server to live server
Actions required on the source site (development server)
- Login to WordPress and install the Duplicator – WordPress Migration Plugin from Plugins > Add New
- Activate the plugin
- Explore the settings if necessary
- From WordPress Dashboard > Duplicator Menu> Run the Duplicator
- Create a New Package – edit the package name if needed
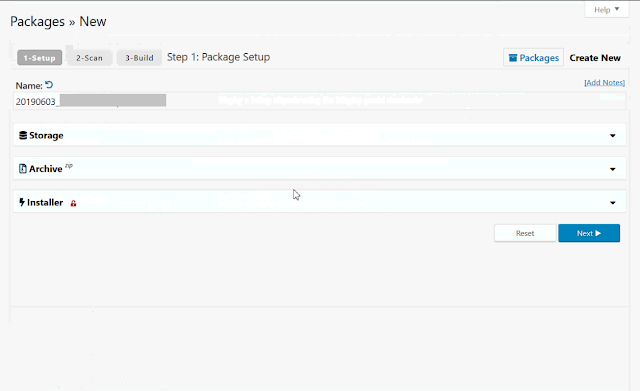
- Some settings when creating a New Package
- Storage: Local (Cloud options available in Pro Version): the files are stored in the local directory of the web host. In this case, C:/xampp/htdocs/websitename/wp-snapshots
- Archive > Files: No need to edit.
However, if you want the package size to be smaller, then you may choose database only.
This will exclude the website files, which then have to be moved manually to the live server via FTP etc. (good for budget hosts). - Archive > Database: Usually not required to edit – the defaults should be fine.
You have the options to disable some database tables which you do not require to include in the exported package. This is not recommended, as some tables which are compulsorily required by the WordPress website may break the website. Choose this only if you know what you are doing.If you want, you may login to phpMyAdmin prior to creating the package to truncate some log related database tables. This would reduce the package size significantly. - Installer: Includes settings to set Host, Host Port, Database Name, Database User. These are optional. Ideally, leave them blank.
- Click NEXT
- The Duplicator plugin will scan the site and display the results of the scan.
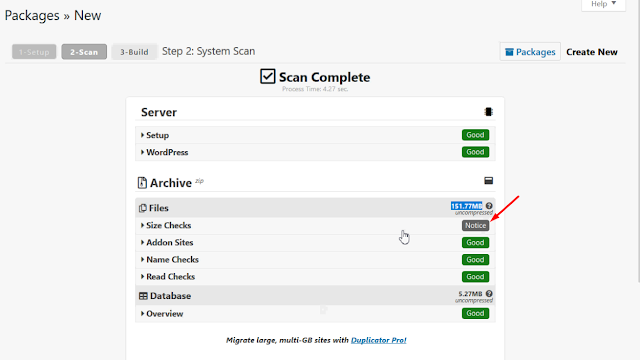
- If any issues are detected, it will be displayed for your attention. Take corrective measures if necessary.
- Note: If the package size to be is large, check your website folder if there are any unnecessary files. Sometimes, we may leave setup files, unused images, unused themes and plugins etc. within the website root directory. Such files may be removed. If necessary move those files manually to the live server later.
- Next, click BUILD to build the package
- After the build process is completed, Duplicator will present the files to download. This includes:
- The Installed (a PHP file)
- The Archive
- Download both the files above to your computer.
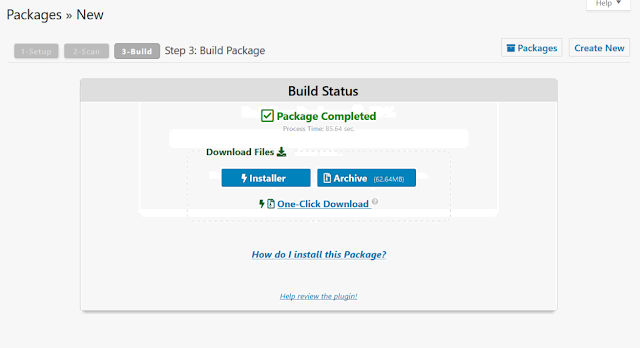
This completes the steps required on the source server.
Next, we need to upload the files downloaded using the Duplicator Plugin on the production server and initiate the process to restore the website on the live server.
Actions required on the destination site (live server)
You need to upload the Installer.php and the Archive file created by the Duplicator Plugin on the source.
- Connect to the live server via the web-host control panel / file manager or via FTP.
- Locate the root folder for the live website – Eg: htdocs, www etc.
- Upload the files (Installer and Archive) downloaded from the Duplicator to the root of the live server
- Run the installer
- If the files are places at the root of the website, Open a browser and browse http://your-site/installer.php
- The Duplicator Installer will validate the files and display the result (PASS / FAIL / WARN). If all is well, proceed to the next step.
- Accept the terms and click NEXT
- Duplicator will then extract the archive
- Install database: This is where we have to configure the database. Provide the database details such as name, user etc.

- lick NEXT
- Update data: This is where the URL and Title of the website is displayed for confirmation. You may edit wherever necessary.
- Update Data > Options: You can create a new Admin account for the WordPress website here if necessary. Otherwise, the same Admin account from the source site will still be available to use.
- Update Data > Scan Options: Here we can choose to activate all or deactivate some plugins if necessary.
- Note: If the website uses some security plugins / firewalls, it is a good idea to disable those plugins for now as there may be login issues.
- When migrating from live to localhost, Google Captcha related plugins should be deactivate. Otherwise, at the login screen, Google Captcha will not work on localhost and Admin will not be able to login. Then, we will need to deactivate the plugin manually by renaming the plugin folder.
- Click Next
- Test Site
- Click on “Admin Login” button to log in to the WordPress website
- Login with the Username and Password to check if you can login
- After logging in to the WordPress Dashboard, check if there are any updates for WordPress Core, plugins, themes etc. Apply updates if there are.
- Enable plugins which you disabled if any.
Workarounds for issue when using the WordPress Duplicator Plugin:
1) If Archive file is too large
b) Exclude WordPress /uploads folder from the archive
You can import it later.
Related Posts you may be interested in:
If you are looking to migrate WordPress the traditional way, you may explore these earlier posts:
- How to move website from XAMPP on one computer to XAMPP on another computer?
- How to migrate site from local development machine to live site?
- How to install and run WordPress using XAMPP on Windows?