It you’re adding a new additional hard disk to your windows computer, then you need to set it up properly so that it can be detected and used by Windows for storing files etc. Usually a new hard disk is not formatted and so it will not be detected by Windows Explorer. So you will not be able to use it directly. In this post we will see how to setup a new additional hard disk using Windows Disk Management.
How to install additional disk on your windows computer?
If it is a desktop computer then you just need to find an additional SATA cable and a space to keep the new hard disk inside the desktop cabinet.
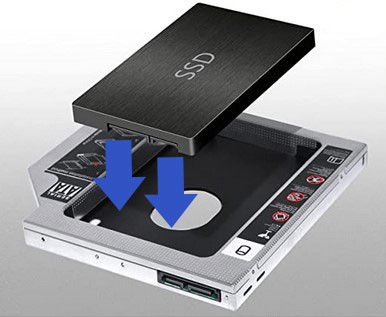
Whereas, if it is a laptop, you need to open the case and see if you have additional SATA provision to add the hard disk, which probably won’t be the case. If you do not have provisions to add the additional hard disk on your laptop but you have a DVD drive with SATA connector which you can sacrifice, then you can buy a hard disk caddy and install the hard disk on the caddy and replace the DVD drive.
How to setup a new additional hard disk using Windows Disk Management?
If you have a new hard disk which you are adding to your computer, then you need to set it up. You can follow the steps below to set up the new hard disk.
1) Open Windows Disk Management
- In Windows 10/11, right click on start button > click Disk Management. You can also right click on THIS PC > click on MANAGE. This will open COMPUTER MANAGEMENT. Click on DISK MANAGEMENT from the left hand side menu.
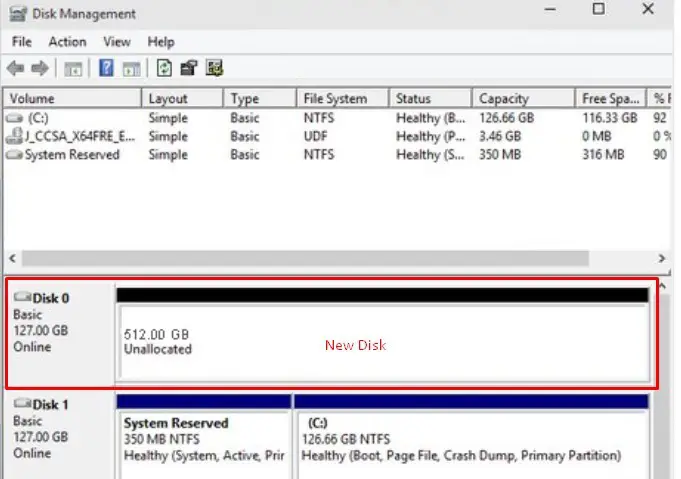
- You will see all your disks listed including the new hard disk.
- You can easily identify the new hard disk because it is shown in black color indicating that it is unallocated space.
If the status of the new disk is “Unknown – Not initialized”
- Right click on the Disk where it says “Unknown / Not Initialized”
- Select “Initialize Disk” and follow the wizard

- In the prompt where you are asked to select the partition style – MBR or GPT > Select GPT.
- Click OK
2) Create a new disk partition on the new hard disk
- Right click on the Unallocated space of the new hard disk > choose New Simple Volume.
- The New Simple Volume Wizard appears > Click Next
- In the next windows, it will present you the space available to create the partition.
If you want to use the entire disk as one partition, you can leave the numbers as they are.
You can also create more partitions from this disk later also.
Otherwise you can specify a size in MB for the new partition.
Note: Size is calculated in MB. So if you want to create a partition of 300 GB, enter 300 x 1024 = 307200 (MB). - The wizard will also present you to set a DRIVE LETTER and FILE SYSTEM – you may use default values.
- Click NEXT
Windows will do the work and create a new partition for you.
After the process completes, you can open Windows File Explorer, and you should see a new disk partition which is ready for use.
Create more partition on the disk?
If you want to create another partition from an existing disk partition, then you can use the Windows disk management shrink feature to shrink the existing partition first and then create an additional partition out of the available space.
- First, Shrink existing partition
- Then, Create new simple volume from the unallocated space created from the shrink above
For example:
- You have a new hard disk of 512 GB. You have already setup the disk and it is detected in the Windows File explorer as well.
- Now you want to split this 512 GB partition in to two partitions with 312 GB and 200 GB partitions.
- Right click on the 512 GB partition / disk > click on SHRINK > the wizard opens.
- Enter the size in MB to shrink the existing partition which is 512 GB in size. So we enter: 200 x 1024 = 204800 (MB). Follow the rest of the prompts by the wizard.
- After the process completes, you will not see new partition which is ‘Unallocated (black)’ of size 200 GB.
- To create a new partition from this 200 GB unallocated space, right-click > select New Simple Volume and follow the rest of the prompts.
- After the process completes, you should be able to see a new partition of 200 GB.
- Open Windows Explorer and you should see these partitions separately.
# New hard disk is not detected in Windows # How to set up new hard disk on Windows # How to initialize hard disk on Windows #How to create new hard disk partitions on Windows #Windows Disk Management Utility